the singularity of being and nothingness
Sencha Touch Theming: 1.1.0
In my last article, I showed how to get setup and started with creating custom stylesheets. After a significant release (1.1.0) and several reader requests, I’m updating the walkthrough with screenshots and instructions for v1.1.0. This version will be strictly business: for discussion about the more interesting points of what’s going on, refer back to the original post 🙂
Step 1: Install Ruby
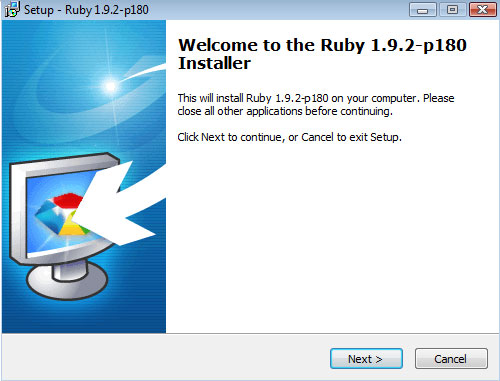
To get SASS setup, you’ll first need to install Ruby and Ruby Gems (SASS is bundled with something called “Compass”, and Compass is a “Gem” that can be added into Ruby). You can go the painful route and install Ruby and then add Gems into it. However, if you’re stupid about these things, you can do what I did and just grab the Ruby 1.92 installer–it comes pre-built with Gems already configured.
Get the Ruby 1.92 Installer
When prompted, choose “”Add Ruby executables to you PATH”
I installed to the default directory on Windows (C:\Ruby192\)
Step 2: Setup Compass
Now that Ruby is installed, the next step is to get Compass (e.g., SASS) setup. This step actually took me the longest, simply because I’m stupid about command-line stuff. So here’s a play-by-play of what to do (this is for Windows…I assume Mac is similar), just in case you suffer from a similar level of stupidity:
- Open a new Command Shell (Start -> Run -> type “cmd”)
- Navigate to your Ruby installation directory (cd/ruby192)
- Type “gem install compass –pre” – if it works, you should see a bunch of text appear about things being installed, configured, and what not.
- BTW, we’re using “–pre” to get a beta version (0.11) of Compass. This is necessary, as the latest non-beta will break when compiling.
Step 3: Done!
You’re done. The next step is to actually start customizing some sassy stylesheets!
| Print article | This entry was posted by existdissolve on April 23, 2011 at 5:05 am, and is filed under CSS3, HTML5, Mobile, Sencha Touch, Web Design. Follow any responses to this post through RSS 2.0. You can leave a response or trackback from your own site. |


about 14 years ago
Great writeup, thanks it helped alot!
Small correction, the gem install should be “gem install compass –pre” (with 2 dashes)
Also in case others have problems, my corp firewall prevented this from installing – tried at home and it worked.